Tuesday, July 14, 2015

How to Setup and Secure Linux SSH Logins to use Private PEM Keys

SSH logins are susceptible to brute force attacks. A thousand things can go wrong which could give someone unauthorized access to your server. The best way to secure your SSH login is to use Public/Private PEM keys. This is default login type for Amazon EC2 servers. Unfortunately Amazon’s interface only created a single account. This tutorial will show you how to setup additional PEM keys for other users.
Once you’ve logged into your server, do the following:
Step 1: New Account setup
Here we will create the new account, and add them to the sudoers group.
sudo adduser user1
sudo su
passwd user1
visudo
Optional: Add the user to Sudoers
visudo
#add this to the last line
1 user1   ALL = (ALL)    ALL
Step 2: Generate the Public/Private key files
Now we will create the public and private key files for user1
su user1
#Enter the password
cd ~/
ssh-keygen -b 2048 -t rsa -f user1
mkdir .ssh
chmod 700 .ssh
cat user1.pub >> .ssh/authorized_keys
chmod 600 .ssh/authorized_keys
chown 600 user1 .ssh
chown user1 .ssh/authorized_keys

Step 3: Download your private key
If you key is not in .pem format you can change it via below command
openssl rsa -in user1 -outform PEM -out user1.pem
You will now have to download, or copy the contents of your private pem file.
If you are going to copy the contents of the file to a key file on your local system, just copy and paste the data into a new file.
Before using your key, make sure to change the permissions to 600.
chmod 600 user1.pem
Step 4: Test your SSH Login
Now let’s test our password-less login to make sure the private pem files are working.
ssh -i /path/to/file/user1.pem user1@server1.exampledomain.com
That should do it! Hope you find this tutorial workable.

Tuesday, May 19, 2015

Fixes for Puppet Enterprise 8 (!! ERROR: The puppet master service failed to start within 120 seconds; unable to proceed)

I was getting this error while installing PE8 on Ubuntu 14.04

!! ERROR: The puppet master service failed to start within 120 seconds; unable to proceed*

Install the below package before you run the puppet installer:

apt-get install zlib1g-dev build-essential libssl-dev libreadline-dev libyaml-dev libsqlite3-dev sqlite3 libxml2-dev libxslt1-dev libcurl4-openssl-dev python-software-properties

This fixed the issue for me and PE8 got installed successfully.

Thursday, February 12, 2015

Tomcat and Apache2 with mod_jk on Ubuntu 14.04

I assume that you have got apache2 and tomcat installed and running on your ubuntu14/ubuntu12 server
I assume that tomcat is running on below URL
http://localhost:8080/tomcat/apps/

Installing and configuring mod_jk 

sudo apt-get install libapache2-mod-jk

First lets enable the redirect port 8443 on Tomcat

Step 1: Configure Tomcat
stop tomcat.
sudo /etc/init.d/tomcat stop

Enable the AJP Connector on the Tomcat container hosting JIRA by uncommenting the following element in $TOMCAT_HOME/conf/server.xml:

<Connector port="8009" URIEncoding="UTF-8" enableLookups="false" protocol="AJP/1.3" />
Start tomcat.
Test that app is accessible on the standard HTTP connector, for example http://appserver:8080. This is to ensure that Tomcat has successfully restarted.

Now we will create our workers.properties file for Apache.

sudo vim /etc/apache2/workers.properties
and paste the below lines in the file

# Define 1 real worker using ajp13
worker.list=worker1
# Set properties for worker (ajp13)
worker.worker1.type=ajp13
worker.worker1.host=localhost
worker.worker1.port=8009

Now to ask Apache to use this worker

sudo vim /etc/apache2/mods-available/jk.conf

change the JkWorkersFile property to /etc/apache2/workers.properties
JkWorkersFile  /etc/apache2/workers.properties
JkLogFile /var/log/apache2/mod_jk.log

Finally to configure the URL Apache should pass through the Tomcat, for this create new site

sudo vim /etc/apache2/sites-available/app.conf

and add the following line in your configuration
<VirtualHost *:80>
.......................................
.......................................
JkMount /tomcat-demo* worker1
</VirtualHost>

Enable the site, execute the below command or create soft link to
a2ensite app.conf

Now, restart the servers

sudo /etc/init.d/tomcat restart
sudo /etc/init.d/apache2 restart

Testing:

Both URL should provide the similar result
http://localhost/tomcat/apps/
http://localhost:8080/tomcat/apps/

mod_jk, mod_proxy_http and mod_proxy_ajp

************************
The Apache Proxy Modules

So far, we have spoken loosely of mod_proxy. However, it's a little more complicated than that. In keeping with Apache's modular architecture, mod_proxy is itself modular, and a typical proxy server will need to enable several modules. Those relevant to proxying and this article include:

mod_proxy: The core module deals with proxy infrastructure and configuration and managing a proxy request.
mod_proxy_http: This handles fetching documents with HTTP and HTTPS.
mod_proxy_ftp: This handles fetching documents with FTP.
mod_proxy_connect: This handles the CONNECT method for secure (SSL) tunneling.
mod_proxy_ajp: This handles the AJP protocol for Tomcat and similar backend servers.
mod_proxy_balancer implements clustering and load-balancing over multiple backends.
mod_cache, mod_disk_cache, mod_mem_cache: These deal with managing a document cache. To enable caching requires mod_cache and one or both of disk_cache and mem_cache.
mod_proxy_html: This rewrites HTML links into a proxy's address space.
mod_xml2enc: This supports internationalisation (i18n) on behalf of mod_proxy_html and other markup-filtering modules. space.
mod_headers: This modifies HTTP request and response headers.
mod_deflate: Negotiates compression with clients and backends.
Having mentioned the modules, I'm going to ignore caching for the remainder of this article. You may want to add it if you are concerned about the load on your network or origin servers, but the details are outside the scope of this article. I'm also going to ignore all non-HTTP protocols, and load balancing.
**********************

We can configure Tomcat with Apache with number of connectors to communicate back and forth. Tomcat uses a variety of protocols. I would be writing down with the mostly used in production environment

mod_proxy_http

mod_proxy_ajp

mod_jk
All above module are good and of Production use, the only thing is that how you are using your current architecture. I found mod_jk and mod_proxy_http above mod_proxy_ajp.

To decide what we are going to use, we need to answer some questions like,

Do we want encrypted communication between apache and tomcat

Does ssl need to terminate on apache and then communication between apache and tomcat is without ssl

If you are using mod_jk or mod_proxy_http and it meets all of your requirements then there is no good reason to change it.


If you need to encrypt the communication between apache and Tomcat then this is significantly easier with mod_proxy_http when you can just switch from the http to the https protocol.

Where apache terminates the SSL, providing the SSL attributes are exposed (two simple directives) then mod_jk automatically passes this information to Tomcat and Tomcat makes it available to web applications without any additional configuration required. To achieve the same result with mod_proxy_http requires apache to be configured to add the SSL information as http headers and a Valve needs to be configured in Tomcat to extract this information and to make it available to web applications. Making SSL information available to Tomcat is therefore a little more complicated with mod_proxy_http.

mod_jk and mod_proxy_http also have very different configuration styles. The mod_proxy_http directives are consistent with other apache directives whereas mod_jk uses an external property file.

Pros and Cons:
mod_proxy

Pros:
       No need for a separate module compilation and maintenance. mod_proxy,
        mod_proxy_http, mod_proxy_ajp and mod_proxy_balancer comes as part of
        standard Apache 2.2+ distribution
       Ability to use http https or AJP protocols, even within the same
        balancer.
Cons:
       mod_proxy_ajp does not support large 8K+ packet sizes.
       Basic load balancer
       Does not support Domain model clustering

mod_jk

Pros:
       Advanced load balancer
       Advanced node failure detection
       Support for large AJP packet sizes
Cons:
      o Need to build and maintain a separate module
My Thought:

If you need to encrypt the apache to Tomcat channel, use mod_proxy_http

If you need to expose SSL information to your web application, use mod_jk

References: http://www.tomcatexpert.com/blog/2010/06/16/deciding-between-modjk-modproxyhttp-and-modproxyajp

Wednesday, October 1, 2014

How to generate and applying SSL on Amazon ELB

In order to successfully install an SSL certificate you need the following things

CSR file
Private key
Certificate key
Certificate chain

I am assuming the below,

Domain Name: testssl.com
Certificate Provider: GoDaddy.com

1. Initiate a CSR

openssl req -new -newkey rsa:2048 -nodes -keyout testssl.key -out testssl.csr

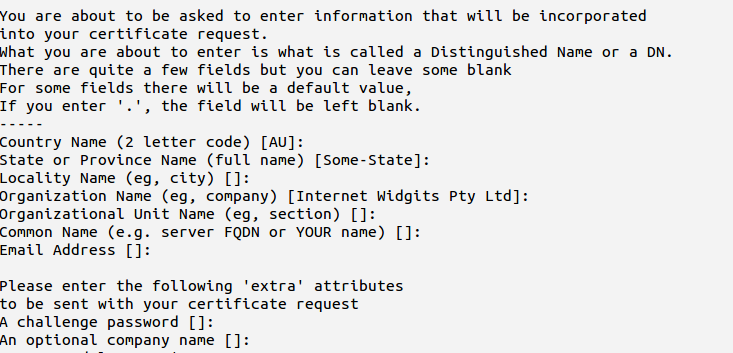
After this command you need to provide the details about the organization and what type (wildcard or subdomain) of certificate you are going to generate.


Now you have completed generating the private key and the CSR.

This will create below files
testssl.csr--will be used in creating certificate on GoDaddy or other certificate issuer authority like verisign,digicert etc.
testssl.key--> Private key (need to convert in pem format)

2. Go to GoDaddy and use testssl.csr file to create the certificate. It will create the certificate and you can download that from that console. You have to tell what type of certificate (Apache, IIS, Nginx, Plesk or Tomcat etc)

This will have two files.

6eba0aaxxxx.crt  certificate file for your domain
gd_bundle-xxx.crt  is your certificate chain file

Now in all you need the below three files:

testssl.key--> Certificate private key file, you generated as part of your request for certificate
6eba0aaxxxx.crt-->  certificate file for your domain--Public Certificate – The public facing certificate provided by your certificate authority
gd_bundle-xxx.crt-->  Certificate Chain – An optional group of certificates to validate your certificate


3. Convert private key to PEM type

Amazon Web services work with PEM files for certificates and you’ll note none of the files we received were in that format. So before using the files, they have to be translated into a format that Amazon will understand.

Private key

The private key is something that you generated along with your certificate request. Hopefully, you kept it safe knowing that you would need it again one day. To get the Amazon supported format for your key,

openssl rsa -in testssl.key -outform PEM -out testssl.pem

this will create testssl.pem

Public certificate

The public certificate is the domain-specific file that you receive, This certificate file must be changed into PEM format for Amazon to use (your certificate might already be in PEM format, in which case you can just open it up in a text editor, copy the text, and paste it into the dialog). You can convert the certificate file into PEM format:

openssl x509 -inform PEM -in 6eba0aaxxxx.crt -out testssl-cert.pem

Certificate chain

The certificate chain is exactly what it sounds like: a series of certificates. For the AWS dialog, you need to include the intermediate certificate and the root certificate one after the other without any blank lines. Both certificates need to be in PEM format, so you need to go through the same steps as with the domain certificate.

openssl rsa -inform PEM -in gd_bundle-g2-g1.crt -out testssl-cert-chain.pem

4. Now you have three files:

testssl.pem -> private key (Generated with CSR)
testssl-cert.pem -> public certificate (domain)
testssl-cert-chain.pem -> certificate chain


5. Go to your AWS console>ELB>select the desired ELB> click edit to upload the new certificate

Certificate Name: any-name (name of certificat on Amazon to remember)
Private Key: vim testssl.pem > copy and paste it here
Public Key Certificate: vim testssl-cert.pem > copy and paste it here
Certificate Chain: vim testssl-cert-chain.pem > copy and paste it here


Now You have certificate on your ELB, go to browser and check

Tuesday, August 19, 2014

Installing Oracle Java8 on CentOS/RHEL

Step 1: Download JAVA Archive

Download latest Java SE Development Kit 8 release from its download page.

# cd /opt/
# wget --no-cookies --no-check-certificate --header "Cookie: gpw_e24=http%3A%2F%2Fwww.oracle.com%2F; oraclelicense=accept-securebackup-cookie" "http://download.oracle.com/otn-pub/java/jdk/8u5-b13/jdk-8u5-linux-i586.tar.gz"
Note: If Above wget command doesn’t not worked for you watch this screencast to download JDK from terminal.

Now extract downloaded archive file

# tar xzf jdk-8u5-linux-i586.tar.gz
Step 2: Install JAVA using Alternatives

After extracting archive file use alternatives command to install it. alternatives command is available in chkconfig package.

# cd /opt/jdk1.8.0_05/
# alternatives --install /usr/bin/java java /opt/jdk1.8.0_05/bin/java 2
# alternatives --config java


There are 3 programs which provide 'java'.

  Selection    Command
-----------------------------------------------
*  1           /opt/jdk1.8.0/bin/java
 + 2           /opt/jdk1.7.0_55/bin/java
   3           /opt/jdk1.8.0_05/bin/java

Enter to keep the current selection[+], or type selection number: 3

At this point JAVA 8 has been successfully installed on your system.

Step 3: Check Version of JAVA .

Check the installed version of java using following command.

# java -version

java version "1.8.0_05"
Java(TM) SE Runtime Environment (build 1.8.0_05-b13)
Java HotSpot(TM) Client VM (build 25.5-b02, mixed mode)

Step 4: Setup Environment Variables

Most of java based application’s uses environment variables to work. Set the java environment variables using following commands

Setup JAVA_HOME Variable
# export JAVA_HOME=/opt/jdk1.8.0_05
Setup JRE_HOME Variable
# export JRE_HOME=/opt/jdk1.8.0_05/jre
Setup PATH Variable
# export PATH=$PATH:/opt/jdk1.8.0_05/bin:/opt/jdk1.8.0_05/jre/bin

Installation of Oracle Java 8 (JDK8 and JRE8) in Ubuntu / Linux Mint

Applies to:
Ubuntu 14.04 LTS, 13.10, 12.10, 12.04 LTS and 10.04 and LinuxMint systems using PPA File. To Install Java 8 in CentOS, Redhat and Fedora read This Article.

Step 1: Install Java 8 (JDK 8)

Add the webupd8team java PPA repository in our system and install Oracle java8 using following set of commands.

$ sudo add-apt-repository ppa:webupd8team/java
$ sudo apt-get update
$ sudo apt-get install oracle-java8-installer

Step 2: Verify JAVA Version

After successfully installing oracle java using above step verify installed version using following command.

$ java -version

java version "1.8.0_05"
Java(TM) SE Runtime Environment (build 1.8.0_05-b13)
Java HotSpot(TM) Client VM (build 25.5-b02, mixed mode)
Step 3: Setup JAVA Environment

Webupd8team is providing a package to set environment variables, Install this package using following command.

$ sudo apt-get install oracle-java8-set-default

References:
https://launchpad.net/~webupd8team/+archive/java

Nodejs on Ubuntu 12.04


Obtaining a recent version of Node or installing on older Ubuntu and other apt-based distributions may require a few extra steps. Example install:
sudo apt-get update
sudo apt-get install -y python-software-properties python g++ make
sudo add-apt-repository -y ppa:chris-lea/node.js
sudo apt-get update

sudo apt-get install nodejs

Check the node version:

node --version

Installation with Forever:

cd /usr/lib/node_modules

sudo npm install forever -g

npm http GET https://registry.npmjs.org/forever
npm http 200 https://registry.npmjs.org/forever
npm http GET https://registry.npmjs.org/forever/-/forever-0.10.11.tgz
npm http 200 https://registry.npmjs.org/forever/-/forever-0.10.11.tgz
npm http GET https://registry.npmjs.org/flatiron
npm http GET https://registry.npmjs.org/forever-monitor/1.2.3
npm http GET https://registry.npmjs.org/nconf
npm http GET https://registry.npmjs.org/nssocket

.